Configure LDAP Sync Service
Related Video: LDAP Sync Service
LDAP Sync Service can be installed to an on-prem network environment that has Active Directory configured. The service provides a continuous one-way sync from an active directory to KACE Cloud.
Once the LDAP Sync Service is installed to an on-prem network environment, administrators can pre-populate KACE Cloud with their user database based on selected users, attributes, and settings. And with multi-forest support, administrators can install an instance of the LDAP client onto each forest they want to sync with KACE Cloud.
- Sign in to KACE Cloud.
- If you want to set a default password for the users that you import into KACE Cloud using the LDAP Sync Service:
- On the Settings tab, navigate to KACE Cloud > Settings.
- On the KACE Cloud Settings page, in the Users section, ensure the Use a default user password for users imported via LDAP Sync check box is configured appropriately.
- If you already imported users into KACE Cloud through LDAP Sync, and you select this check box, the default password is not set for those imported users.
- The default password is only set for the users imported after you enable this setting.
- On the KACE Cloud Settings page, click Save.
For more information about this page, see Explore KACE Cloud Settings.
- Download the LDAP Sync Service Client.
- On the KACE Cloud Settings page, select Integrations > LDAP Sync Service.
- Confirm that you have the most recent version of the client.
- Download the LDAP Sync Service Client, then open it.
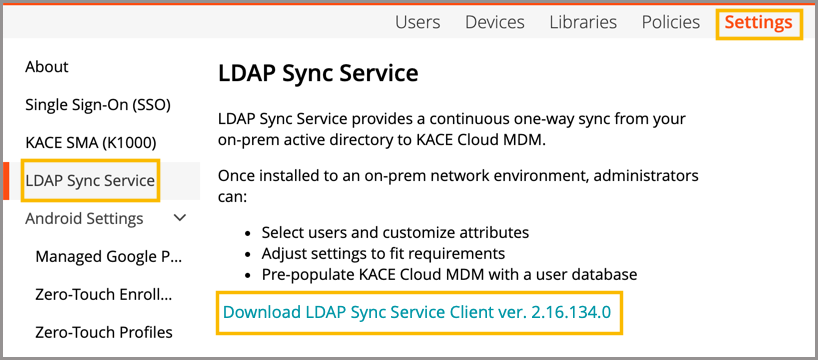
- On the KACE Cloud Settings page, select Integrations > LDAP Sync Service.
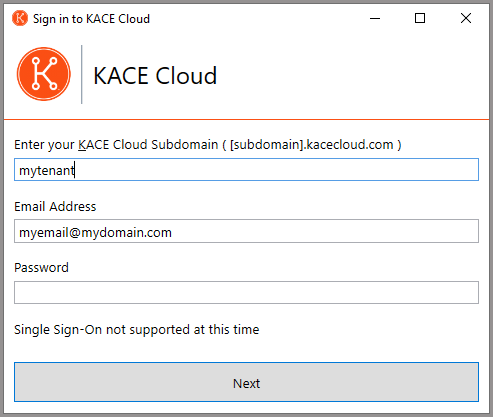
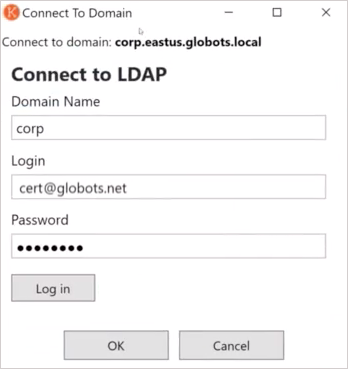
- Log in to KACE Cloud.
- Enter your Domain Name.
- Enter your Login and Password.
- Click Next.
- Create custom user fields so that user fields can be mapped to them.
- Click Define Custom Fields.
- Click New.
- Use the form to create custom user fields.
- When completed, click OK.
- When finished defining custom fields, click Next.
.png)
- Configure domains.
- To add a domain:
- Click Add.
- This action will open the Edit Domain modal.
- Enter LDAP credentials for the domain to be added.
- Add a Forest.
- Select the domain out of the forest that you wish to add.
- When completed, click Next.
.png)
- Click Add.
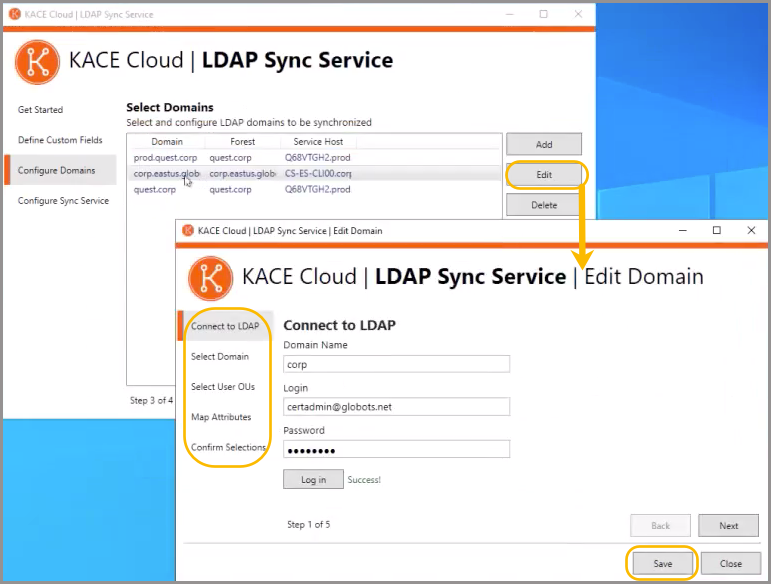
- To edit a domain:
- Click Edit.
- This action will open the Edit Domain modal.
- Enter LDAP credentials for the domain to be edited.
- Click Edit.
- Edit domain, OUs, and/or attributes, clicking Next to move through sections.
- Select user OUs. An admin can decide which parts of the domain they'd like to sync by adding or removing organizational units or containers, or even entire domains.
.png)
- Map attributes. An admin can also map LDAP attributes to pre-defined or custom KACE Cloud user fields that can be managed during the Add or Edit workflows.
.png)
- On the Confirm Selections tab, click Save to save the new configuration settings back to KACE Cloud. When complete, the Edit Domain window closes.
- To synchronize the current machine to the selected domain, the admin must Claim the domain.
- Select a domain.
- Click Claim.
- Enter LDAP credentials for the domain you wish to claim.
- When complete, click Log in, then OK.
After logging in, the admin will be returned to the Configure Domains tab of the wizard, and the Forest and Service Host information is populated.
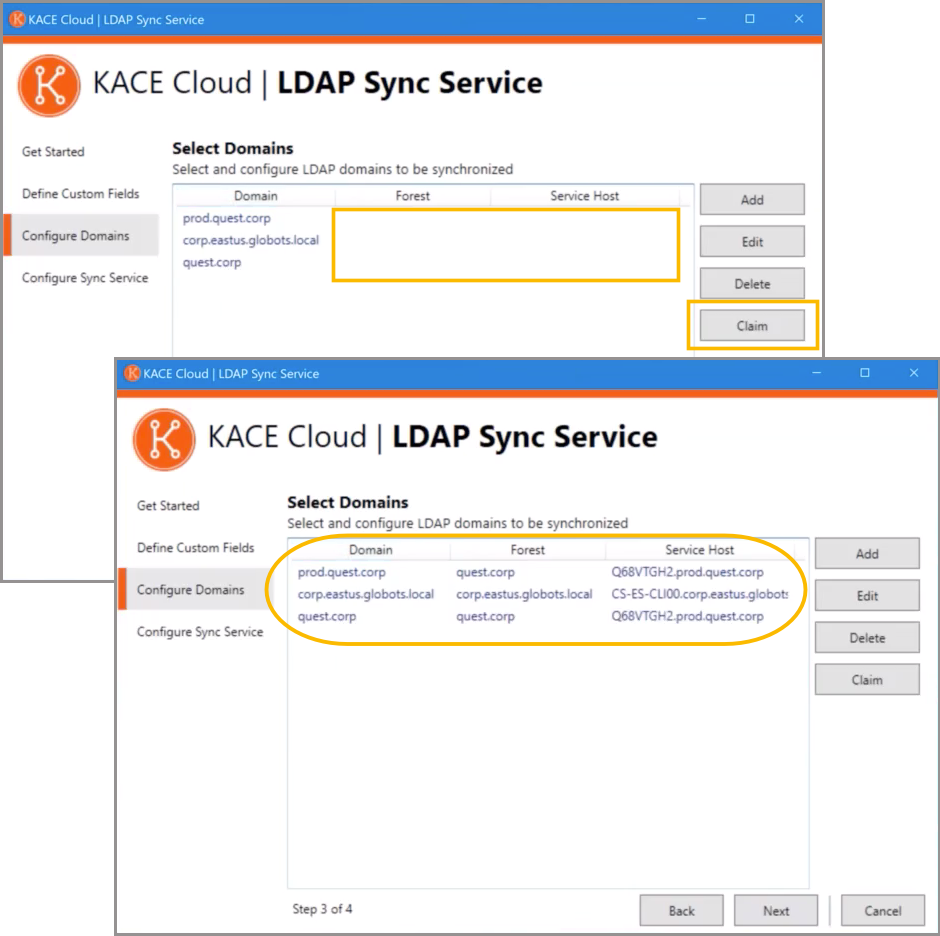
Once claimed, an admin has the option to add, edit, and delete domains. And with multi-forest support, an admin can install the LDAP Sync Service on a client computer in additional active directory forests to configure LDAP sync settings for the domains in those forests.
The information shown on the Configure Sync Service tab represents only the LDAP configurations that are on the current machine. An admin may have a view into multiple domain-forest setups being synchronized to other machines on the Select Domains page, but when it comes to configuring the sync service, it will only apply to LDAP configurations on the current machine.
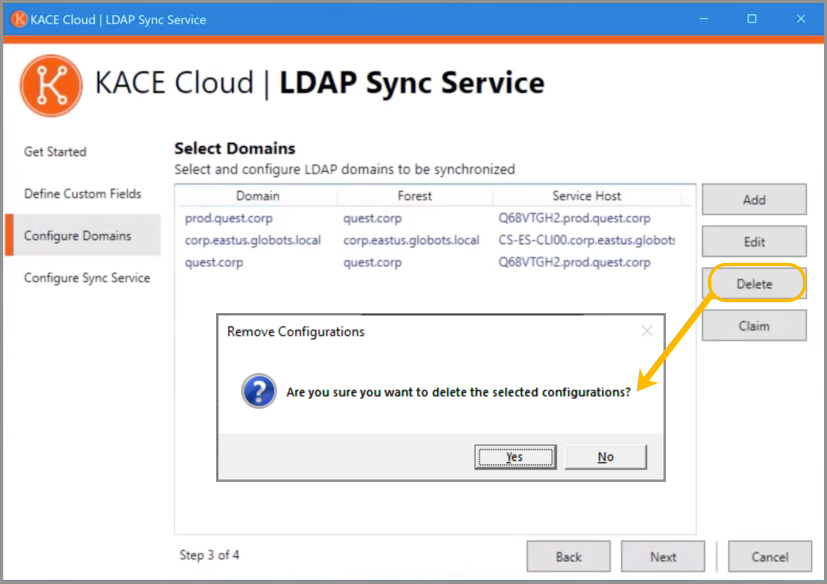
- To delete a domain:
- Click Edit.
- To add a domain:
- Configure sync service. After the domain configuration steps are completed, click Next to configure the sync service.
The information shown on the Configure Sync Service tab represents only the LDAP configurations that are on the current machine. An admin may have a view into multiple domain-forest setups being synchronized to other machines on the Select Domains page, but when it comes to configuring the sync service, it will only apply to LDAP configurations on the current machine.
The status of the LDAP configuration will show up as True or False in the Connected column.
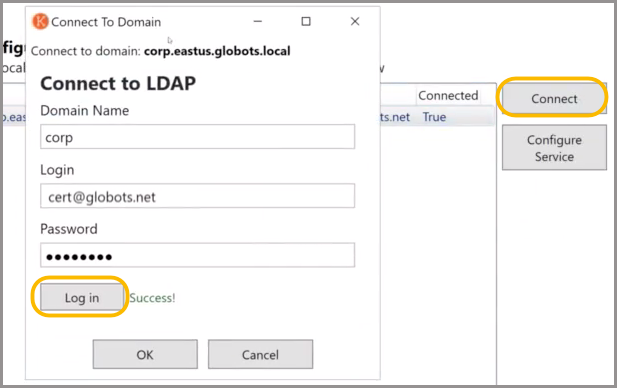
- Select a domain.
- Click Connect.
- Enter your LDAP Login and Password.
When specifying your login name, you must use the following format to include fully quallified domain name (FQDN): <user_name>@<FQDN>. Failing to do so results in a successful connection, however, it prevents the LDAP sync service from uploading any accounts to KACE Cloud.
- Click Log in, then OK.
Any LDAP configuration with a connected status of True can be configured using the Configure Service workflow.
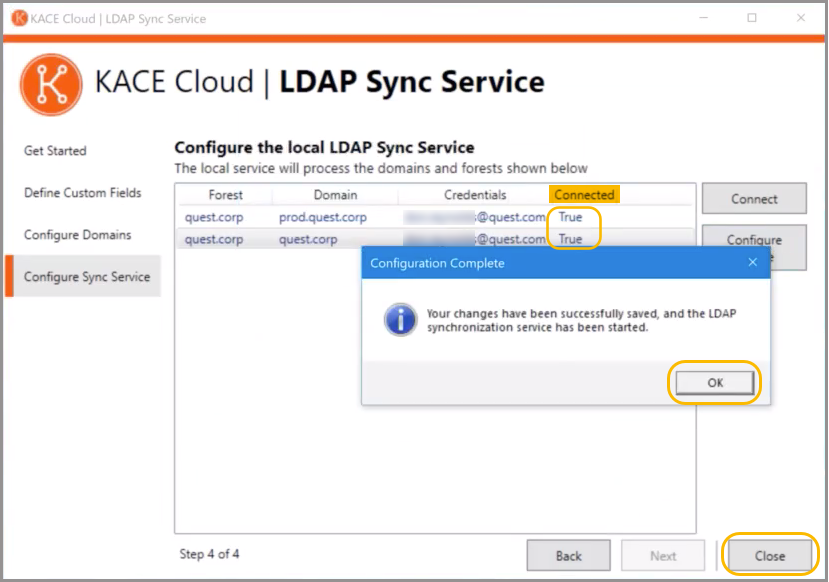
Once all domains show a connected status of True, changes have been successfully saved. This means the LDAP Sync Service has been started.
- Click OK, then Close to end the wizard.